|
Today Sarah Furrer, Studio 180 Design, shared the Shaded Four Patch pieced border for our sampler quilt. You can also find the fabric requirements for the sampler in an earlier post from Studio 180 Design here. I got my borders pieced in Twilight Chic, the Island Batik collection from Deb Tucker. I am planning to make again in Steam Engine once shops have the fabric in stock. The beauty of the Studio 180 Design tools and the Blockbusters is that I could make it in a different size without using too much brain power. Maybe I'll make a mini with 3" and 6" blocks. Or maybe bigger with 9" and 18" blocks. Decisions, decisions! 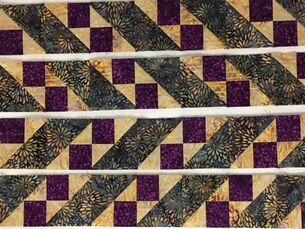 For your reference, the scheduled stops on the Whistle Stop Tour are:
Monday September 9th
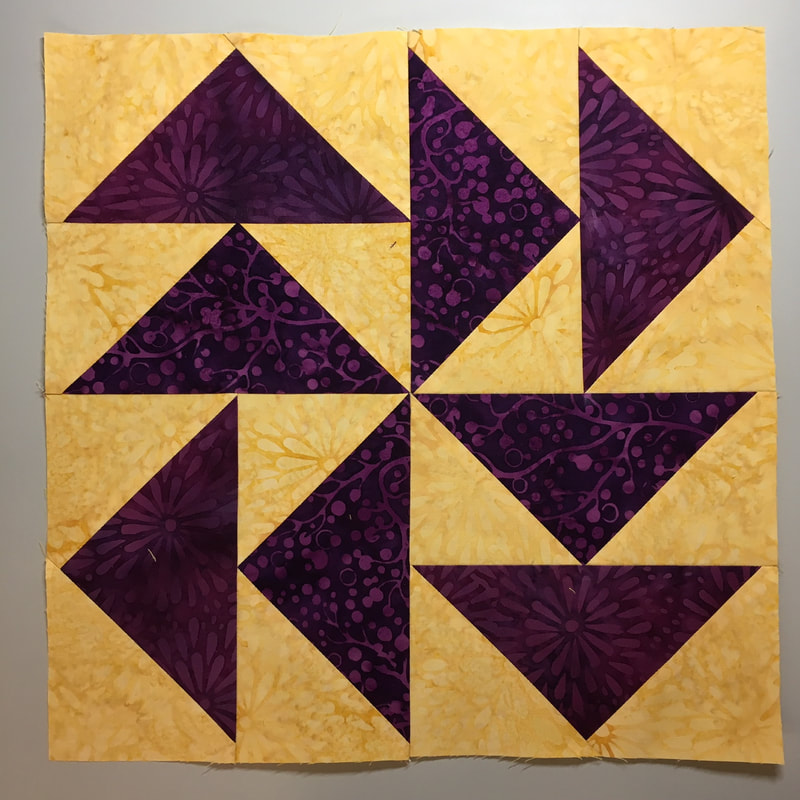
Today there are 2 stops on the tour. One is with my friend and fellow Studio 180 Design Certified Instructor, Michelle Renee Hiatt, Sew On the Go. Michelle shared the 12" Do the Twist block. The 6" 54-40 or Fight block was presented by Marie McKay, Ribbon Star Studio. Here are my blocks. Again I am using Deb Tucker's Island Batik collection by Kathy Engel called Twilight Chic. I sure hope I can keep up with the blog hop. For your reference, the scheduled stops on the Whistle Stop Tour are:
Monday September 9th
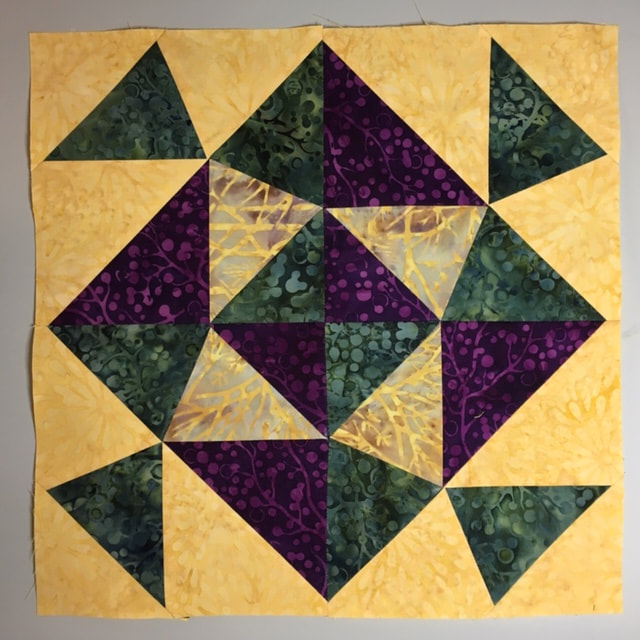
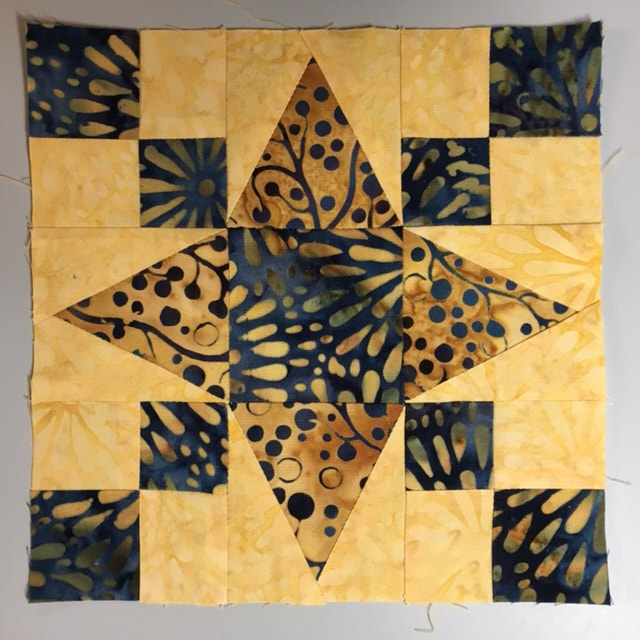
The blog hop started today with an awesome post from my friend and fellow Studio 180 Design Certified Instructor, Karen Overton, The Quilt Rambler. She even included a video showing how she uses a stiletto to match points. It is definitely worth a view. Be sure to visit her post and download today's two blocks - 12" Dutchman's Puzzle and 6" Winged Four Patch. There is a pdf download for each block. I decided to try and follow along with this blog hop. Don't worry, I will still have my own stop on the tour later this week. Here are my two blocks from today. I used Deb Tucker's earlier Island Batik collection Twilight Chic by Kathy Engel. Note that although the pictures are the same size, I did make them correctly. The one on the left is the 12" Dutchman's Puzzle. The 6" Winged Four Patch in on the right. I'm not sure if I'll be able to keep up with all of the days but I'll do my best. For your reference, the scheduled stops on the Whistle Stop Tour are:
Monday September 9th
I have written before about my love for The Quilt Pattern Magazine (TQPM). In this month's issue (September 2019) is my pattern Lucky Stars. I hope you like it as much as I do. It is the 19th pattern of mine that has been published in TQPM. There are 3 more of my patterns in the works and will be appearing in future issues. For full disclosure, I now work for the magazine formatting patterns. It is fun to see how others approach piecing so I find it an interesting job working with some very talented people. If you are interested in getting a subscription to this digital-only magazine, go to Subscription Special and use the secret code CDMQ. Back to my newest pattern, Lucky Stars. This is a huge 9-patch like my Easy Garden pattern. I hope you like it. 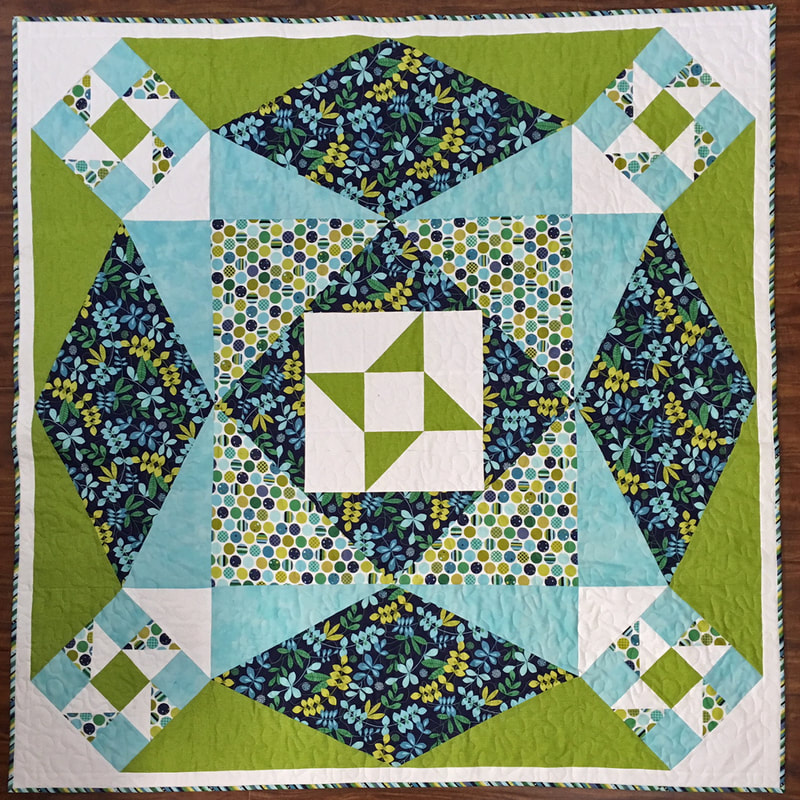 As with all of my patterns, I made Lucky Stars in two colorways. Which do you like better? 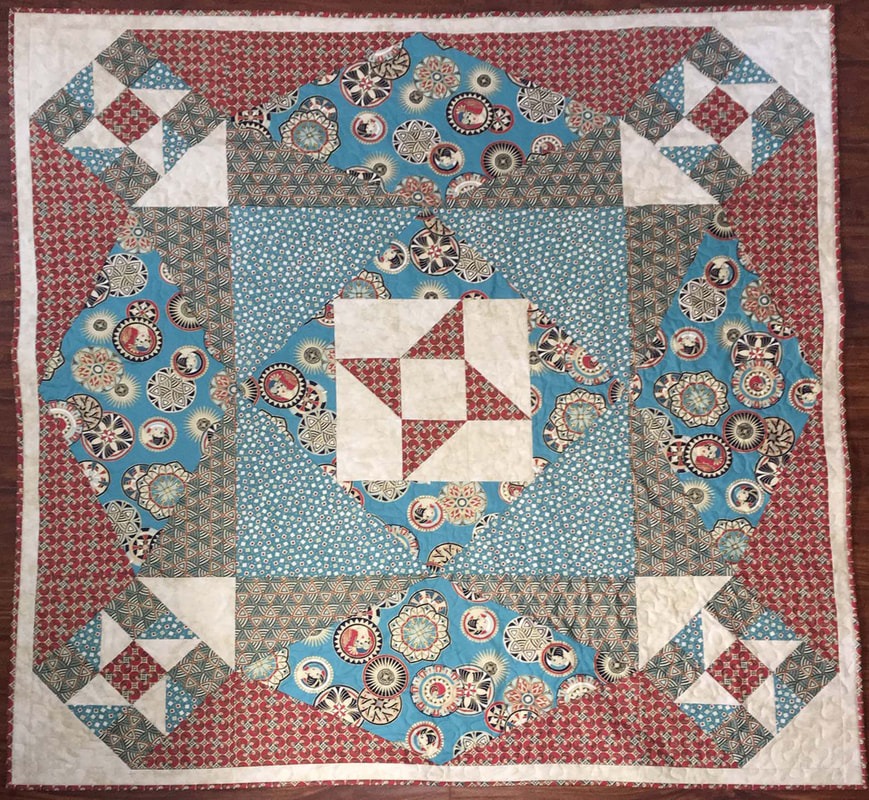 See you again soon with the Steam Engine Blog Hop in just a few days.
To say that things have been busy about covers it. I started this month with a fabulous Sleep In Your Own Bed Retreat in Hinsdale, New Hampshire. Everyone that attended claimed that the facility was awesome. They all got a lot of quilting accomplished. I was fortunate enough to have my sister, Sally, here to help with the food. 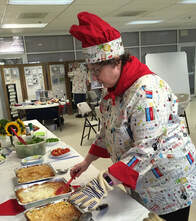 That's my sister's husband in the background. I have on our Row by Row Experience outfit for 2019. The theme is Taste the Experience so Sally made us chef outfits - love mine! Unfortunately, I didn't get a picture of her serving. Here are samples of the beautiful work that got done. It was such a success that the next one is in the planning stages. Stay tuned for dates, etc. Since the retreat I have been catching up on pattern testing. There are some marvelous new patterns and techniques in the future. I can hardly wait to share. You are in luck though because I do have something exciting to share. Coming soon to a computer near you is the Whistle Stop Tour - Steam Engine Blog Hop. We will be featuring Blockbuster blocks form Studio 180 Design and fabrics from Island Batik's Steam Engine collection. Through this blog hop you will get a marvelous sampler quilt pattern.Monday September 9th
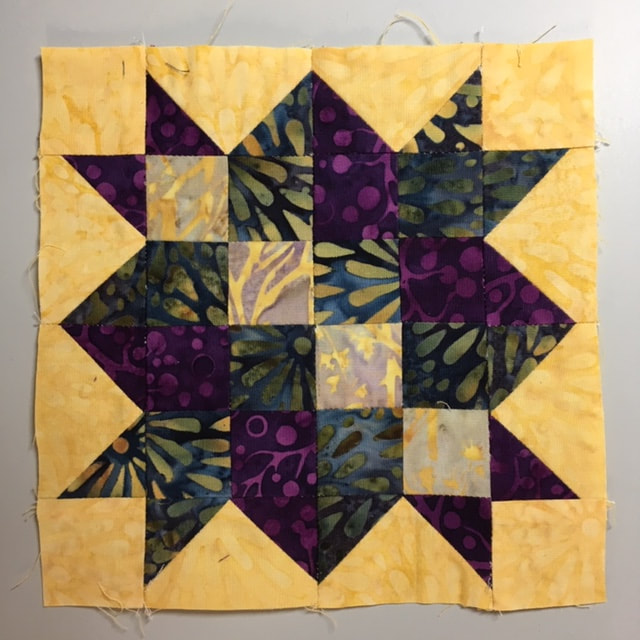
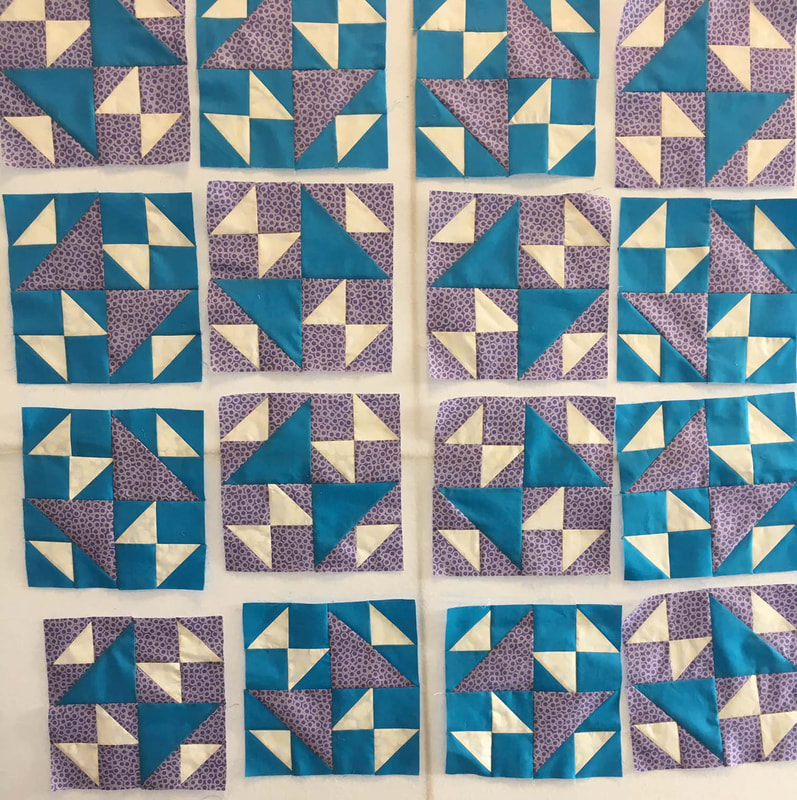
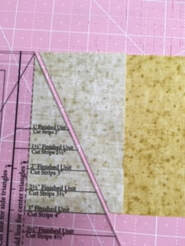
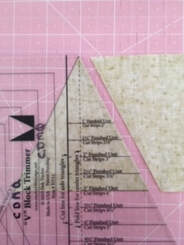
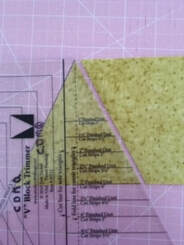
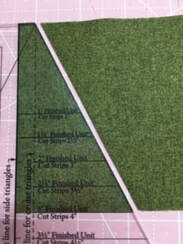
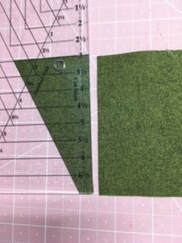
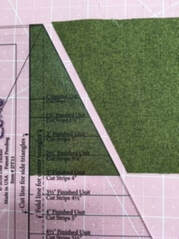
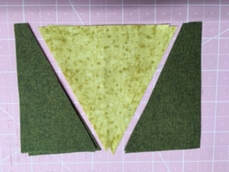
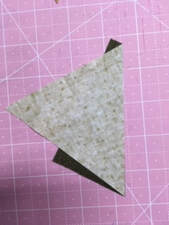
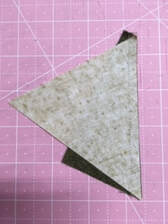
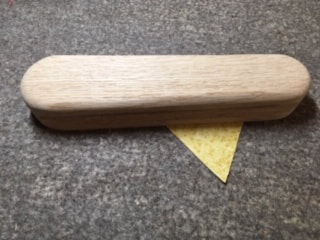
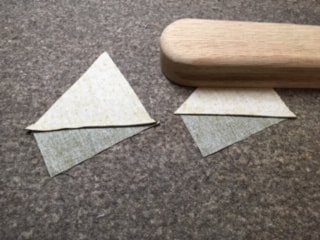
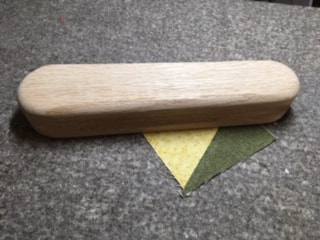
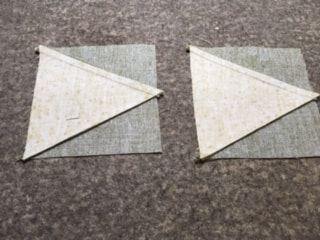
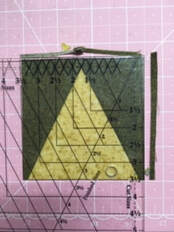
I am so excited to be part of this blog hop with my fellow Studio 180 Design Certified Instructors. Now it is my turn and I'm going to fill you in on the V-Block tool plus some tools I use to enhance my pressing. So to get started you just need to decide on what size finished unit you would like to make. The size strips to cut for each of the 11 possible finished sizes are listed on the slanted end of the tool. I picked a size and cut strips the correct width from 2 fabrics - a gold for the center triangle and a luscious green for the side triangles.
Schedule for Tuckerize Your Quilting Blog Hop
Day 1: Tammy Silvers, Tamarinis Tina Dillard, Quilting Affection Designs Day 2: Karen Overton, The Quilt Rambler Sarah Furrer, Studio 180 Design Day 3: Gail Renna, Quilt Haven Threads Marie McKay, Ribbon Star Studio Day 4: Debbie Chiarelli, Quilts by Debbie (guest blogging for Tina Dillard) Day 5: Michelle Hiatt, Sew On the Go Rosella Hanson (guest blogging for Tammy Silvers) Day 6: Bonny Peters, Cat Den Mountain Quilts (Hey, that's me!) Lydia Ziegler (guest blogging for Karen Overton) "Tuckerize Your Quilting" is a blog hop designed by Studio 180 Design Certified Instructors to share their love of the tools plus more. It starts on Monday so prepare to do some blog hopping. Check out the schedule below. My contribution will be Saturday the 20th. I know you won't miss that one but each post will have information that you won't want to miss.
Monday, July 15th Tammy Silvers, Tamarinis tamarinis.typepad.com Tina Dillard, Quilting Affections http://quiltingaffection.blogspot.com/ Tuesday, July 16th Karen Overton, The Quilt Rambler https://thequiltrambler.com/blog/ Sarah Furrer, Studio 180 Design https://deb-tuckers-studio-180-design.myshopify.com/blogs/news Wednesday, July 17th Gail Renna, Quilt Haven Threads www.quilthaventhreads.wordpress.com Marie McKay Ribbon, Star Studio ribbonstarstudio.com/blog Thursday, July 18th Deborah Chiarelli, Guest Blogging for Tina Dillard http://quiltingaffection.blogspot.com/ Friday, July 19th Michelle Hiatt, Sew On the Go http://sewonthego.blogspot.com Rosella Hanson, Guest Blogging for Tammy Silvers tamarinis.typepad.com Saturday, July 20th Bonny Peters, Cat Den Mountain Quilts https://www.catdenmountainquilts.com/project-journal Lydia Zeigler, Guest Blogging for Karen Overton https://thequiltrambler.com/blog/ Today I am unveiling my new company logo. Check out the Home tab to see a cute bobcat with glasses - that's me - in front of a delectable mountain block representing Cat Den Mountain where I live. The logo was designed for me by Tammy at Gem Graphics in Keene, New Hampshire. I am in awe of her talent.
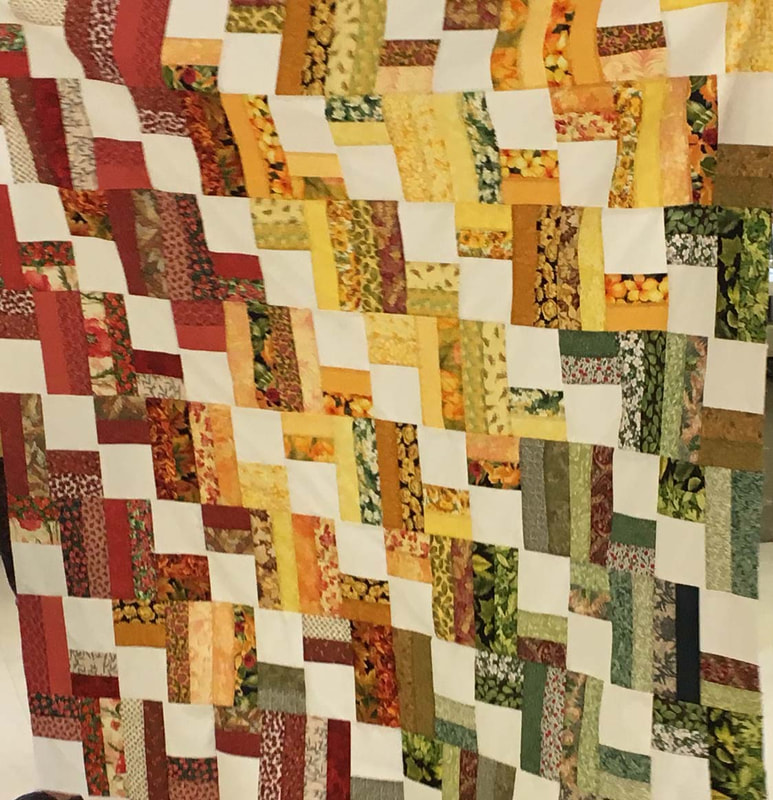
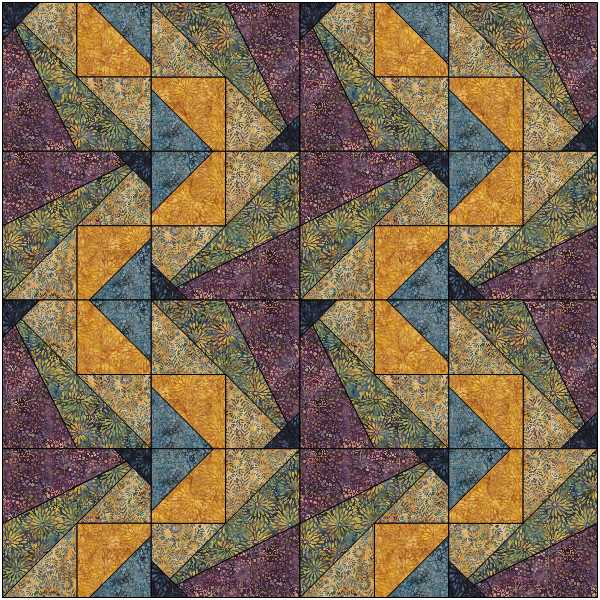
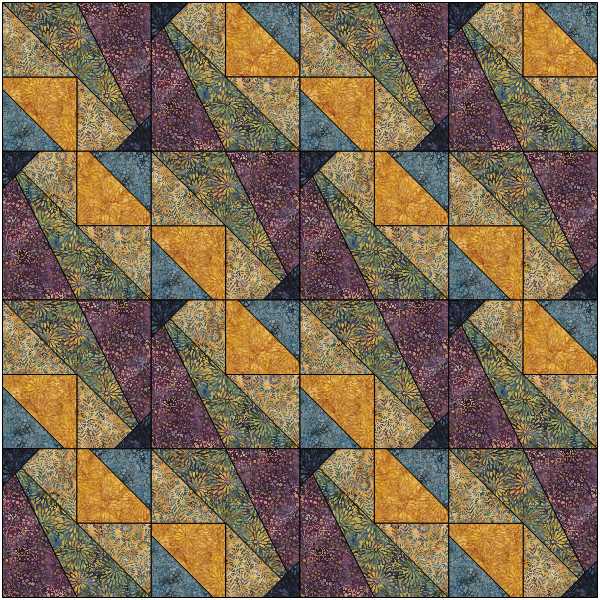
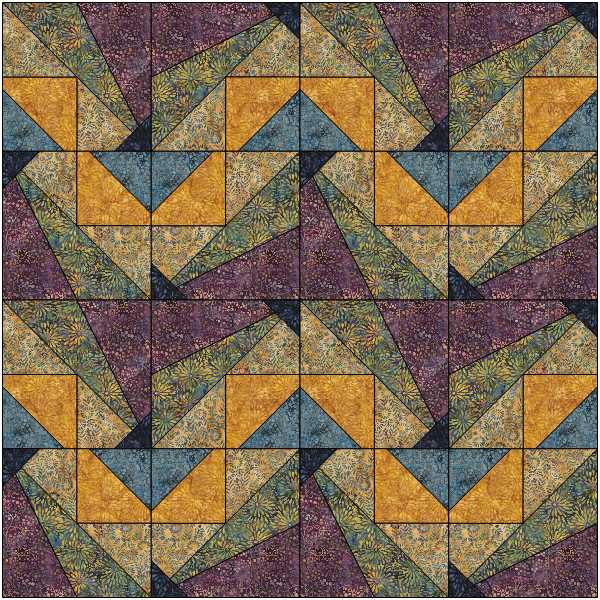
Having a new logo also meant it was time to redesign my website. Most of it is the same but the look is different. I hope you can find what you are looking for when you visit. The new look will launch later today with the posting of the July installment of the CQG 2019 BOM. My next task is to reformat my patterns. I will slowly be bringing the new versions of them online. So far only "Alternate Ways" has gotten the face lift. since one is now done, the rest should be easier to bring up to speed. My patterns will still be available in both paper and digital versions. In other news, I now work for The Quilt Pattern Magazine. My role is behind the scenes formatting patterns for inclusion in the issues. That entails translating the designers' vision into the high-quality pattern for which TQPM is known. Using CorelDraw, I draft the diagrams to accompany the written instructions. It is a lot of work but also very enjoyable seeing a pattern come to life. It is my goal to not be so much of a stranger. I'll try to keep you better informed about what is happening on the mountain. That may include some wildlife videos so stay tuned. Electric Quilt has a Design Challenge this month using Deb Tucker's Island Batik collection Twilight Chic. I participated in a blog hop for this awesome collection not too long ago so this challenge was right up my alley. I had a design that I had worked on a while back that hadn't quite been finished and this seemed the perfect time to do just that. The texture in the Island Batik fabric really adds to any quilt. 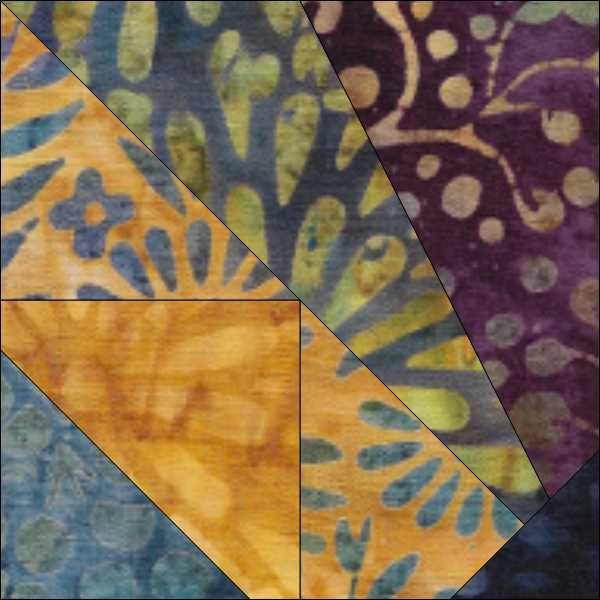 Do you see what I mean about texture? This is the block I used in my design. It looks complicated, doesn't it? Well it isn't! The first thing to do is make a Shaded Four Patch. The technique sheet tells you how to make using your Tucker Trimmer. 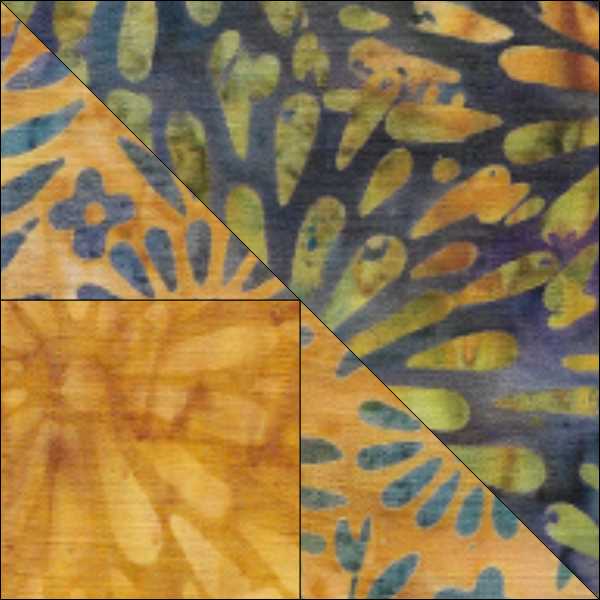 Can you see the Shaded Four Patch in the block? No? That's because the lower left corner has been popped using the awesome Corner Pop tool. 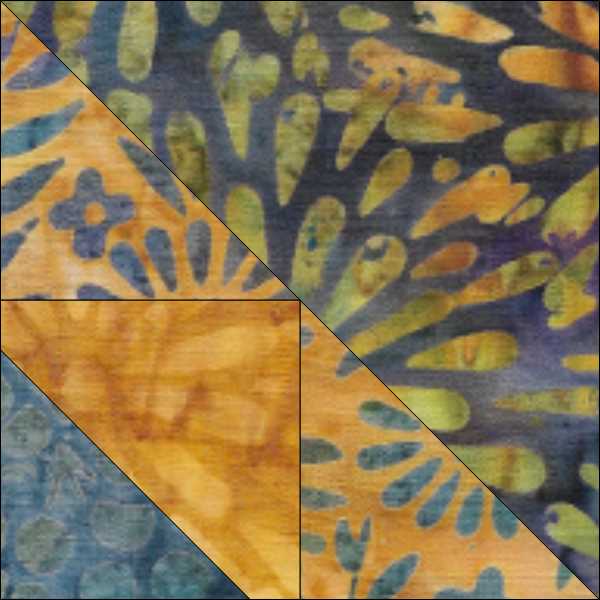 Now let's take a Sliver off the right side. This is a technique for the Corner Beam tool. 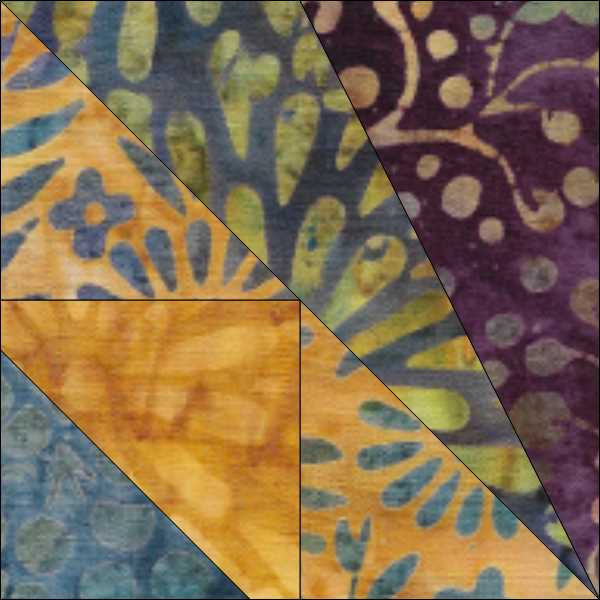 Almost there. Let's just give it one more little pop on the lower right corner.  Now the fun really begins when you put more than 1 of these blocks together. Isn't this fabulous? Thanks for stopping by and joining in the challenge.
As many of you know, I design patterns that are published in The Quilt Pattern Magazine. In the March 2019 issue you will find my latest design, Happy Pinwheels. 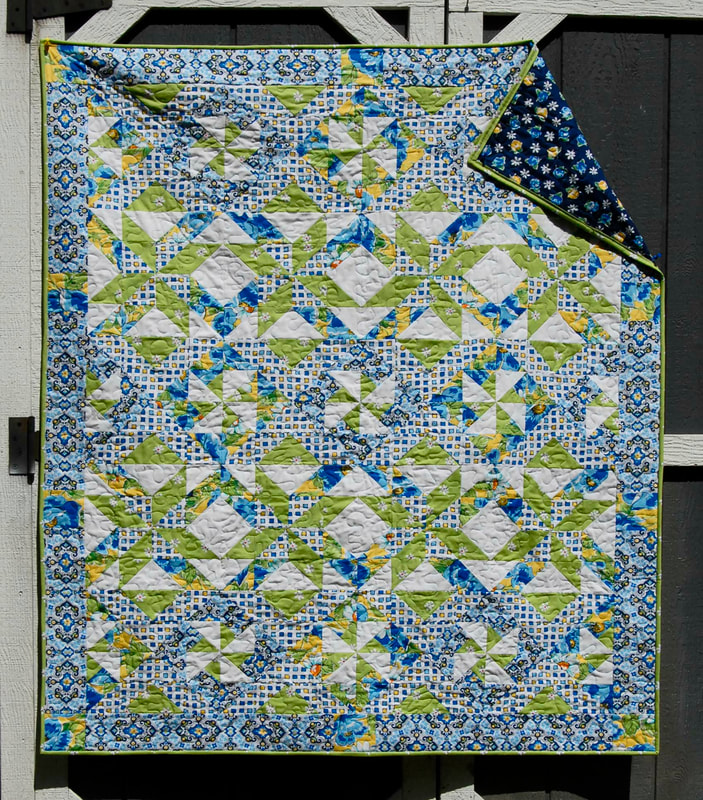 If you are interested in subscribing to The Quilt Pattern Magazine, click here and use the discount code: CDMQ. Before I forget, I want to share pictures of the tops from the patterns I tested in this month's issue of TQPM - Burst & Telluride Puzzle. I really enjoyed piecing these interesting patterns. For full disclosure, I work for TQPM formatting patterns from other designers for the magazine. I don't get any extra money for promoting. I just love the magazine. 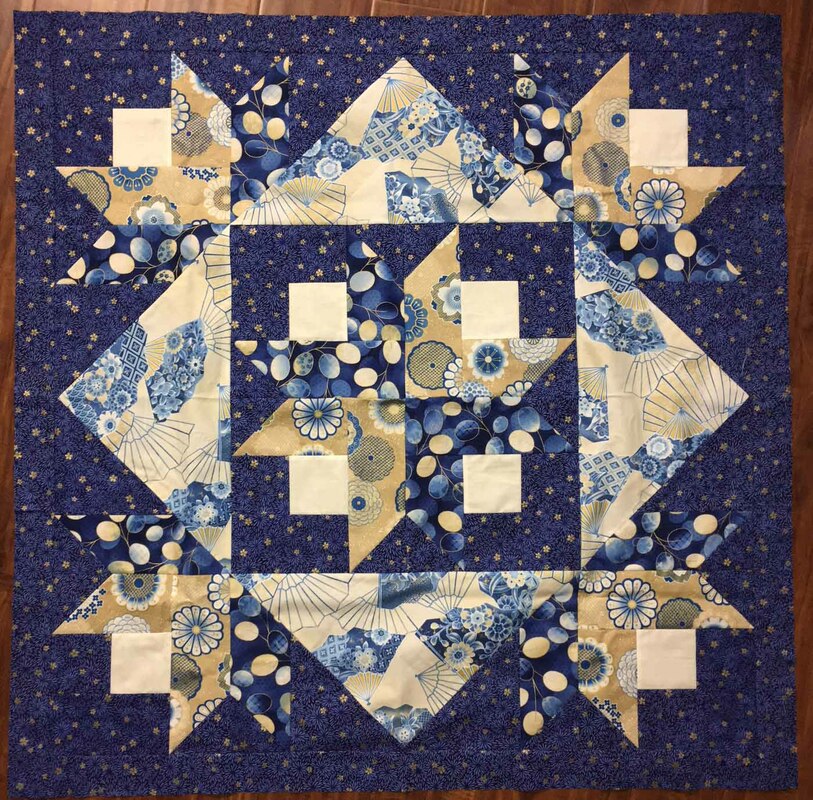 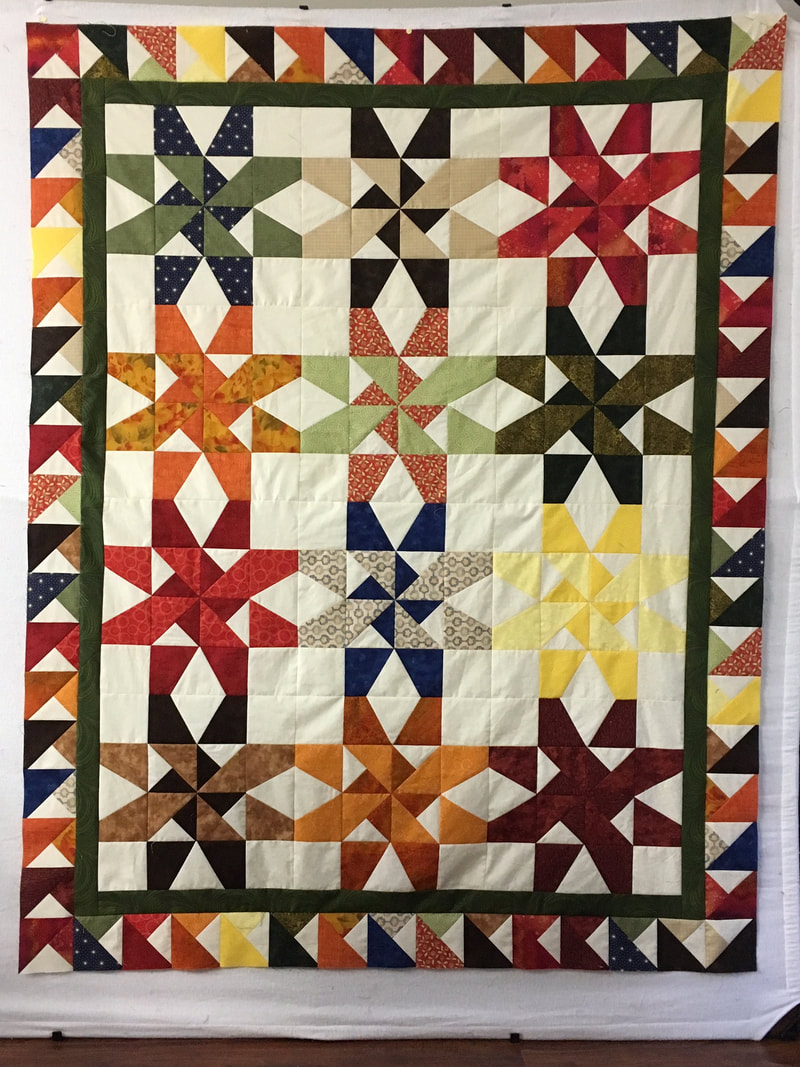 Today I was sewing the sample for a mystery quilt that will be published starting in the October issue. When it gets closer I might tell you more about it. IT is twin size and will be a nice project to work on over the winter. Also, check out one of my local quilt shops, Four Pines Quilting, in Claremont, New Hampshire. March marks the start of the BOM I designed called Modern Twist. There are 4 colorways so there should be one you'll love. They mail nationwide so everyone can enjoy.  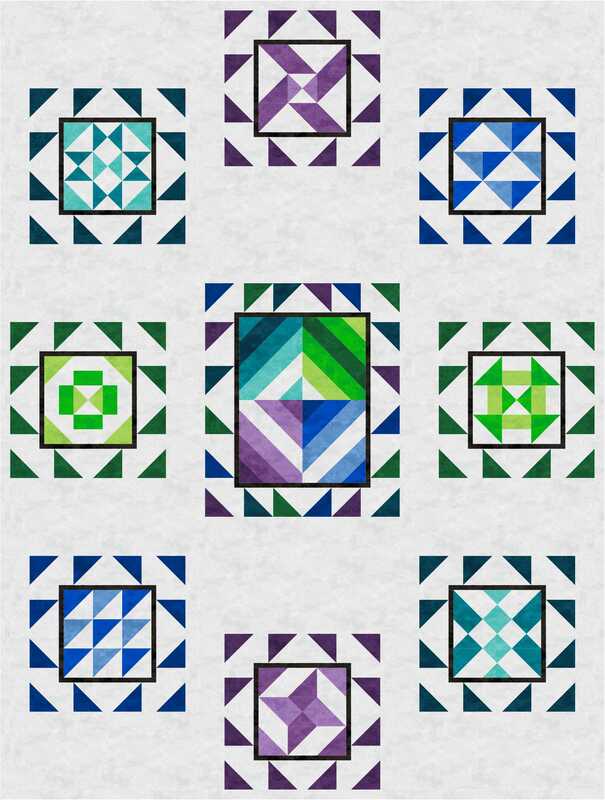 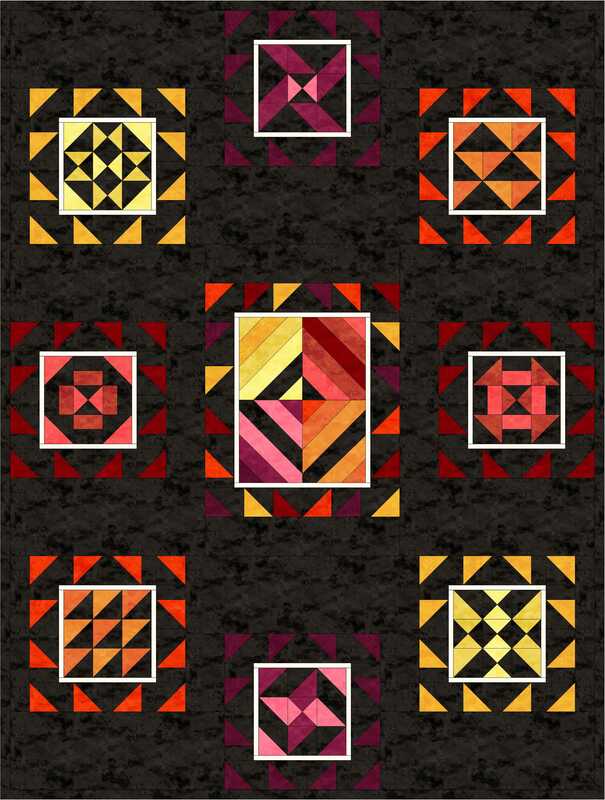 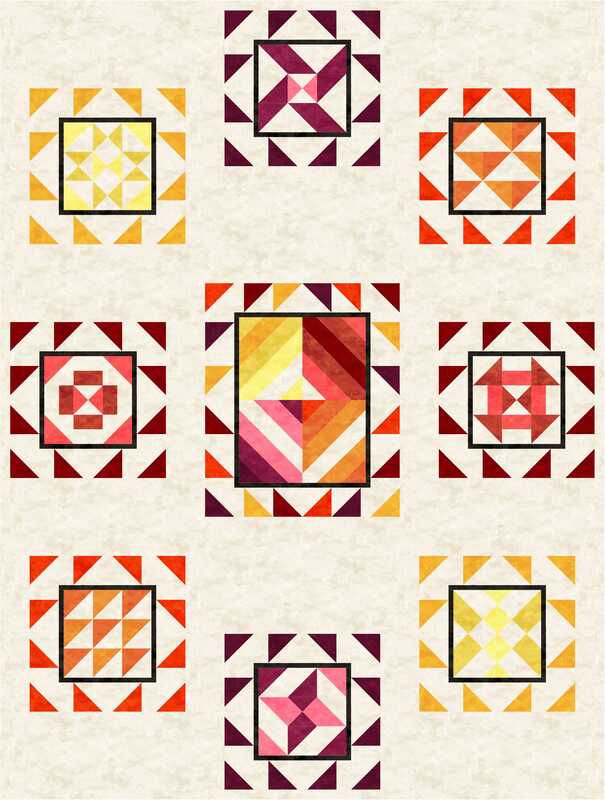 That's it for now. Talk to you again soon.
|
Archives
June 2023
Categories |


 RSS Feed
|
|
|