Cat Den Mountain Quilts
  • Home
  • BOM 2018 Starstruck
  • BOM 2020 Mystery
    • 2020Mystery-Month1
    • 2020Mystery-Month2
    • 2020Mystery-Month3
    • 2020Mystery-Month4
    • 2020Mystery-Month5
  • Calendar
  • Project Journal
  • BOM 2019
    • BOM2019-Month1
    • BOM2019-Month2
    • BOM2019-Month3
    • BOM2019-Month4
    • BOM2019-Month5
    • BOM2019-Month7
    • BOM2019-Month6
    • BOM2019-Month8
    • BOM2019-Month9
    • BOM2019-Month10
    • BOM2019-Month11
    • BOM2019-Month12
  • Tutorials
    • BOM 2017
    • Half-Square Triangles
    • Tucker Trimmer for HST
    • Flying Geese
    • Wing Clipper for Flying Geese
  • About
    • Contact
    • FAQ

My turn for Tuckerize Your quilting blog hop

7/20/2019

Comments

 
Picture
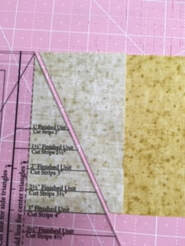
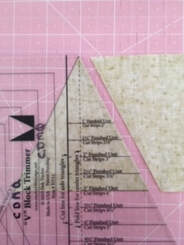
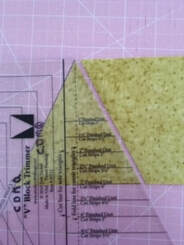
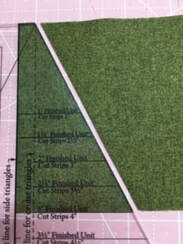
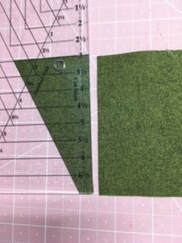
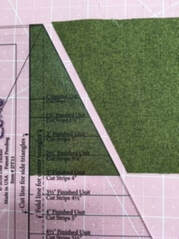
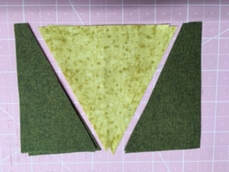
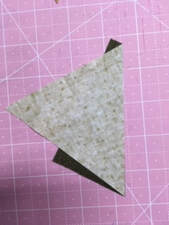
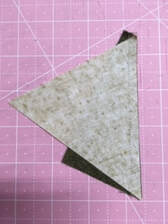
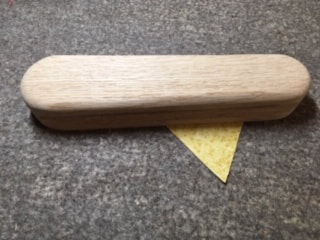
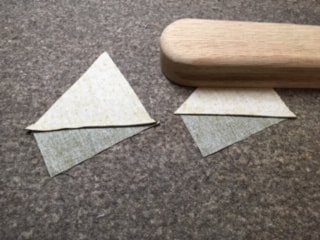
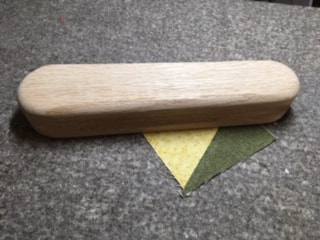
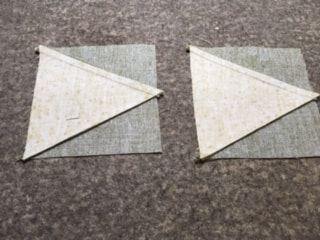
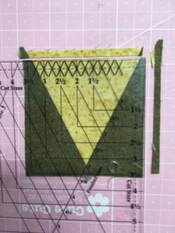
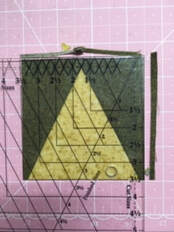
I am so excited to be part of this blog hop with my fellow Studio 180 Design Certified Instructors. Now it is my turn and I'm going to fill you in on the V-Block tool plus some tools I use to enhance my pressing.
So to get started you just need to decide on what size finished unit you would like to make. The size strips to cut for each of the 11 possible finished sizes are listed on the slanted end of the tool. I picked a size and cut strips the correct width from 2 fabrics - a gold for the center triangle and a luscious green for the side triangles.
To cut the center triangle, I folded over the end of the strip far enough so I could line up the dashed line of the tool on the fold and have sufficient fabric to cut my first center triangle. If I was left handed, I would have had the strip going away from me instead of to the right. (Rotate the picture counterclockwise to see.)

​
​For the next center triangle, I flipped the strip over and aligned the center triangle trim line with the edge of the fabric. If I was left handed, I would have had the strip going away from me instead of to the right. (Rotate the picture counterclockwise to see.)


For a third center triangle, I flipped the strip back to right side up and again aligned the center triangle trim line with the edge of the fabric. If I was left handed, I would have had the strip going away from me instead of to the right. (Rotate the picture counterclockwise to see.)


Now to cut the side triangles I left the strip folded in half and removed the selvedges. For the first pair of side triangles I aligned the bold line on the cut edge of my fabric strip. If I was left handed, I would have had the strip going away from me instead of to the right. (Rotate the picture counterclockwise to see.)


​For the second pair of side triangles, I had to rotate my tool 180 degrees. I looked for the diagonal line that slants up and to the left from the bottom of the tool. That line aligns with the cut edge of the fabric to cut the side triangles. Note in the picture that the section used for cutting the side triangles from the strip is at the bottom of the trim down section of the tool. The edge of the tool is on the bottom of my strip. If I was left handed, I would have had the strip going away from me instead of to the right. (Rotate the picture counterclockwise to see.)

​For the third pair of side triangles, I rotated the tool back so I could again align the bold line with the cut edge of my strips. If I was left handed, I would have had the strip going away from me instead of to the right. (Rotate the picture counterclockwise to see.)


The next step was to lay out the pieces in the correct orientation. That way I knew which side triangle went on which side of the center triangle.


I lined up the center traingle with a side triangle keeping the center triangle on top. The points of the center triangle were placed at the points of the side triangle. 


Then I stitched the seam keeping the center triangle on top and using the edge of the center triangle as my guide for the 1/4" seam.


​Then I pressed the seam toward the side triangle. I spray of water or starch or whatever on the back of the unit. Then I press from the front side. In the picture you see my 2 tools for better pressing. I use a wool mat which reflects the heat from the iron back into the fabric. This helps to make a better crease. The other item is a wood block that I apply after pressing. The block absorbs any remaining moister and retains the heat in the unit. The combiantion of the wool mat and wood block make for a much flatter seam as shown in the second picture.

I repeated the process to sew on the other side triangle. I kept the center triangle on top and made sure the points of the triangles were lined up. The seam was pressed toward the side triangle and I used my wool mat and wood block.

I hope you can see in the picture that the V Block unit on the right is flatter than the unit on the left. I used my wool mat for both but did NOT use the wood block on the unit on the left. The seams are flatter in the unit on the right.

​
The beauty of the V Block tool is the trim down section. The slanted lines that cross at the desired finished size were placed on the seam lines of the unit. That allowed me to trim along the top and right edges since I am right handed. If I was left handed, I would have had the V pointing to the right. (Rotate the picture counterclockwise to see.)

Then I rotated the unit so I could trim the other 2 sides. If I was left handed, I would have had the V pointing to the left. (Rotate the picture counterclockwise to see.)


I hope you found this step by step process for using the V Block tool helpful. 

Stay tuned for future posts and Blog Hops. You never know what you'll learn unless you stop by and visit.
​
Picture
Picture
Picture
Picture
Picture


Picture
Picture
Picture
Picture
Picture
Picture
Picture
Picture
Picture
Picture
Schedule for Tuckerize Your Quilting Blog Hop
Day 1:
     Tammy Silvers, Tamarinis
     Tina Dillard, Quilting Affection Designs
Day 2:
     Karen Overton, The Quilt Rambler
     Sarah Furrer, Studio 180 Design
Day 3:
     Gail Renna, Quilt Haven Threads
     Marie McKay, Ribbon Star Studio
Day 4:
     Debbie Chiarelli, Quilts by Debbie (guest blogging for Tina Dillard)
Day 5:
     Michelle Hiatt, Sew On the Go
     Rosella Hanson (guest blogging for Tammy Silvers)
Day 6:
     Bonny Peters, Cat Den Mountain Quilts (Hey, that's me!)
     Lydia Ziegler (guest blogging for Karen Overton)
     
Comments

    Archives

    April 2020
    January 2020
    November 2019
    September 2019
    August 2019
    July 2019
    March 2019
    February 2019
    January 2019
    March 2018
    February 2018
    January 2018
    December 2017
    October 2017
    September 2016
    April 2016
    March 2016
    February 2016
    January 2016
    December 2015
    November 2015
    September 2015

    Categories

    All

    RSS Feed

    Would you like news from the mountain?

Subscribe to Newsletter
The Quilt Pattern Magazine
  • Home
  • BOM 2018 Starstruck
  • BOM 2020 Mystery
    • 2020Mystery-Month1
    • 2020Mystery-Month2
    • 2020Mystery-Month3
    • 2020Mystery-Month4
    • 2020Mystery-Month5
  • Calendar
  • Project Journal
  • BOM 2019
    • BOM2019-Month1
    • BOM2019-Month2
    • BOM2019-Month3
    • BOM2019-Month4
    • BOM2019-Month5
    • BOM2019-Month7
    • BOM2019-Month6
    • BOM2019-Month8
    • BOM2019-Month9
    • BOM2019-Month10
    • BOM2019-Month11
    • BOM2019-Month12
  • Tutorials
    • BOM 2017
    • Half-Square Triangles
    • Tucker Trimmer for HST
    • Flying Geese
    • Wing Clipper for Flying Geese
  • About
    • Contact
    • FAQ